Dropped your phone and wound up with a cracked screen? You’re not alone, and you don’t have to spend hundreds on a replacement or repair. For only $2 and a few minutes of your time, you can fix that cracked cell phone screen at home using a method that’s simple and surprisingly effective.
This do-it-yourself trick uses common materials you can find at any Walmart, and it’s much better than rubbing on toothpaste or slapping tape across your screen. If you want to know how to fix a cracked cell phone screen in 60 seconds, keep reading for the full, step-by-step guide.
Cracked screens don’t have to mean the end of your phone. If you’re looking to get rid of cracks on your phone screen and revitalize your device, this guide will show you how to do it without spending a fortune.
Materials Needed for DIY Phone Screen Repair
You don’t need fancy gadgets or professional tools for this method. Everything you need is affordable and easy to find. With only about two dollars, you can get all the supplies you’ll use for this phone screen crack repair liquid method. Here’s what you’ll need:
- Clear fingernail polish (cost: about $0.98 at Walmart)
- Single-edge razor blades or a small utility razor (a pack costs about $0.99)
- Rubbing alcohol (if you don’t have it, a small bottle costs under $2, but you’ll only use a bit)
- Toilet paper or soft paper towel (most households have this on hand)
Why these items?
The clear fingernail polish acts as a filling agent, seeping into the cracks and bonding as it dries. The razor cleans away any excess for a smooth finish. Rubbing alcohol cleans the screen so the polish can stick and fill properly.
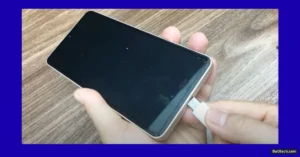
Step 1 – Preparing Your Phone Screen for Repair
Start strong by giving your phone screen a thorough cleaning. Dirt, oils, and smudges will prevent the polish from bonding with the glass, so don’t rush this part. Here’s how to do it right:
- Dab a small amount of rubbing alcohol onto a piece of toilet paper or a soft cloth.
- Gently wipe the screen until it’s completely clean.
- Make sure to cover the area with cracks, but don’t let the liquid drip into your phone’s buttons or openings.
- Allow the screen to air dry fully before moving to the next step.
Why is cleaning so important?
If the screen isn’t clean, the polish might peel off or fail to sink into the cracks. Oils from your hands can also block the liquid from getting deep inside broken glass.
Clean your phone really well to make sure this method works as well as possible.
Quick tip: Use a gentle touch and avoid using too much alcohol. Excess moisture can seep into your phone and cause problems.
Preparing your phone is the foundation of this fix. Rushing the cleaning step can ruin the final look and leave you with visible cracks. Take your time to do it right.
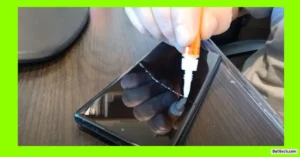
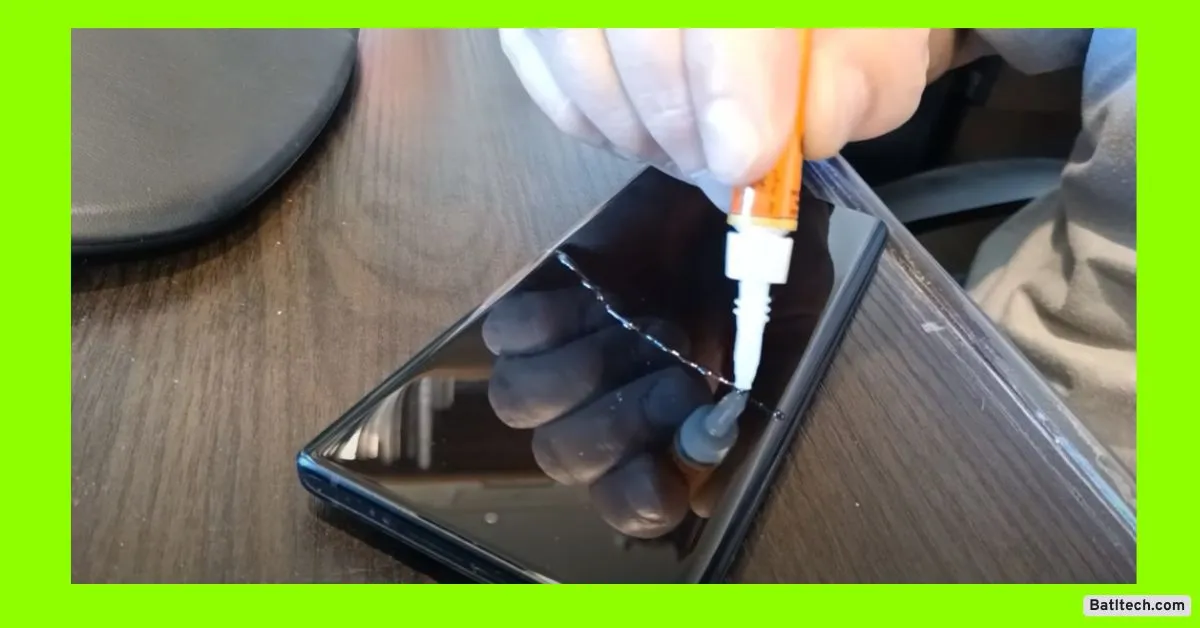
Step 2 – Applying Fingernail Polish to the Cracks
Now you’re ready to get those cracks filled. The main goal is to let the clear polish flow into the spiderwebs and fissures in your screen. Here’s how to fix a cracked phone screen without replacing it, right from your kitchen table:
Step-by-step instructions for liquid repair:
- Open your clear fingernail polish. Use the brush to lightly cover each visible crack.
- Focus on long cracks first, then hit the smaller or branching ones.
- Don’t be stingy—a bit extra polish is better than too little.
- The more liquid that seeps into the cracks, the better they’ll get filled.
- Brush polish along the lines of damage, making sure it gets into all gaps.
- Let the polish sit and dry. Blowing gently on the screen can speed this up.
- Drying takes about 30 seconds. Double-check that it’s hardened before scratching or touching it.
The polish works almost like a “liquid bandage” for your glass, hiding cracks and restoring strength. Unlike using clear tape (which can look messy with air bubbles and can peel), liquid polish is invisible once dry, making for a much cleaner repair.
If you’ve heard about using toothpaste for cracked screens, skip it. Toothpaste may reduce glare or hide cracks for a day, but it smears and never truly fills the damage. Liquid polish is a made-for-glass solution and works much better for permanent results.
Step 3 – Removing Excess Polish Using Razors
Once the fingernail polish has fully dried, any excess will be sitting on the surface of your screen. Now’s the time to scrape off what you don’t need. This step is quick and important for a clean finish.
Be careful near the phone’s speaker and camera lenses. You don’t want to scratch these sensitive parts or push debris inside.
Here’s how to safely remove the extra polish:
- Hold a single-edge razor blade at a shallow angle to the surface of your phone.
- Gently push the blade across the screen, scraping away the dried polish.
- If the blade is sharp and the polish is fully dry, it will peel off easily without much force.
- Work in small sections. When the blade gums up, scrape the polish off the razor and keep going.
- Avoid the speaker and camera areas, or use a corner of the razor for small spaces.
You might think using a razor could scratch your phone, but if you use a proper sharp blade and apply only light pressure, your screen will stay scratch-free. Just don’t dig in or scrape back and forth hard.
Bold warning: Be very careful near sensitive parts like the speaker grill and camera lens. A slip can damage these components, so take it slow.
If you notice a bit of polish that’s stubborn or still sticky, wait another minute for it to dry more—or reapply the polish if the crack isn’t fully filled yet.
Visual tip: Imagine your screen going from cloudy and sticky to crystal clear and smooth—just like when it was new, except the cracks are now barely visible.
Step 4 – Final Cleaning and Results
With all the extra polish scraped away, your phone screen will already look better. For the finishing touch, do another quick clean with rubbing alcohol to remove any fingerprints or leftover residue.
- Put a bit more alcohol on a clean piece of toilet paper or soft cloth.
- Wipe the screen, covering every part you worked on.
- Let the screen dry and enjoy your work.
If you followed the steps, you’ll see that most or all of your cracks are now much harder to spot. The polish fills in the broken glass, so light doesn’t catch on it the same way. The repair will hold up to touch, is smoother than tape, and won’t peel off with use.
Cost Summary:
Why spend $100 or more on professional repair or shell out for a whole new phone when you can do it yourself for only $2? This method saves money and gives new life to a cracked device.
Before and after:
Imagine a screen riddled with clear, white cracks. Now, after liquid repair, those same cracks fade into the background. Your screen is still cracked under the polish, but it’s smooth, safe to use, and doesn’t catch your fingers or attract dust.
Motivation:
Don’t toss your device just because it’s cracked! With this DIY fix, you can keep using your phone stress-free.
Additional Tips and Personal Experience
Having tried other quick fixes like clear tape, I can say this liquid phone screen crack repair method works far better. Tape peels, picks up dust, and makes your phone look like it’s been through a war. It also leaves annoying air bubbles and rough edges that get worse with time.
Conclusion
You don’t have to live with a shattered screen or break the bank at a repair shop. Now you know how to fix a cracked cell phone screen in 60 seconds with a method that’s cheap, easy, and actually works. This DIY method stands out compared to others, like using toothpaste or tape, since it lasts longer and looks better.
Read also.
- My phone says there is water in the charging port, but it’s dry? Fix Charging Port Issues in 2025
- How to Fix iPhone Camera Flipping Problem Solution 2025: Complete Guide for All iPhones
- How to Fix a Phone Stuck on Boot Screen: Redmi Note 2025 (Step-by-Step)

Hello! I am Manjunath Kumar. Welcome to batltech.com! BatlTech delivers the freshest mobile updates together with cutting-edge news and technology insights to all users. Our mission involves providing the latest updates regarding smartphones